


A Gameboy Micro is a handheld game console released by Nintendo in 2005. It is the smallest and lightest member of the Gameboy Advance family of consoles. To make a Gameboy Micro, you will need: – A Gameboy Micro console – A Phillips head screwdriver – A small flathead screwdriver – A pair of tweezers First, use the Phillips head screwdriver to remove the four screws on the back of the console. Next, use the small flathead screwdriver to pry open the back panel. Be careful not to damage the plastic casing. Once the back panel is removed, you will see the battery compartment. Remove the old battery and insert the new one. Make sure the + and – symbols are facing the correct way. Next, locate the ribbon cable that connects the motherboard to the screen. Carefully disconnect the ribbon cable from the motherboard. Then, use the tweezers to remove the old screen. To install the new screen, first connect the ribbon cable to the motherboard. Then, use the tweezers to carefully place the new screen into the housing. Make sure the screen is seated correctly and that the ribbon cable is not damaged. Finally, replace the back panel and screw it into place. Your Gameboy Micro is now ready to use!
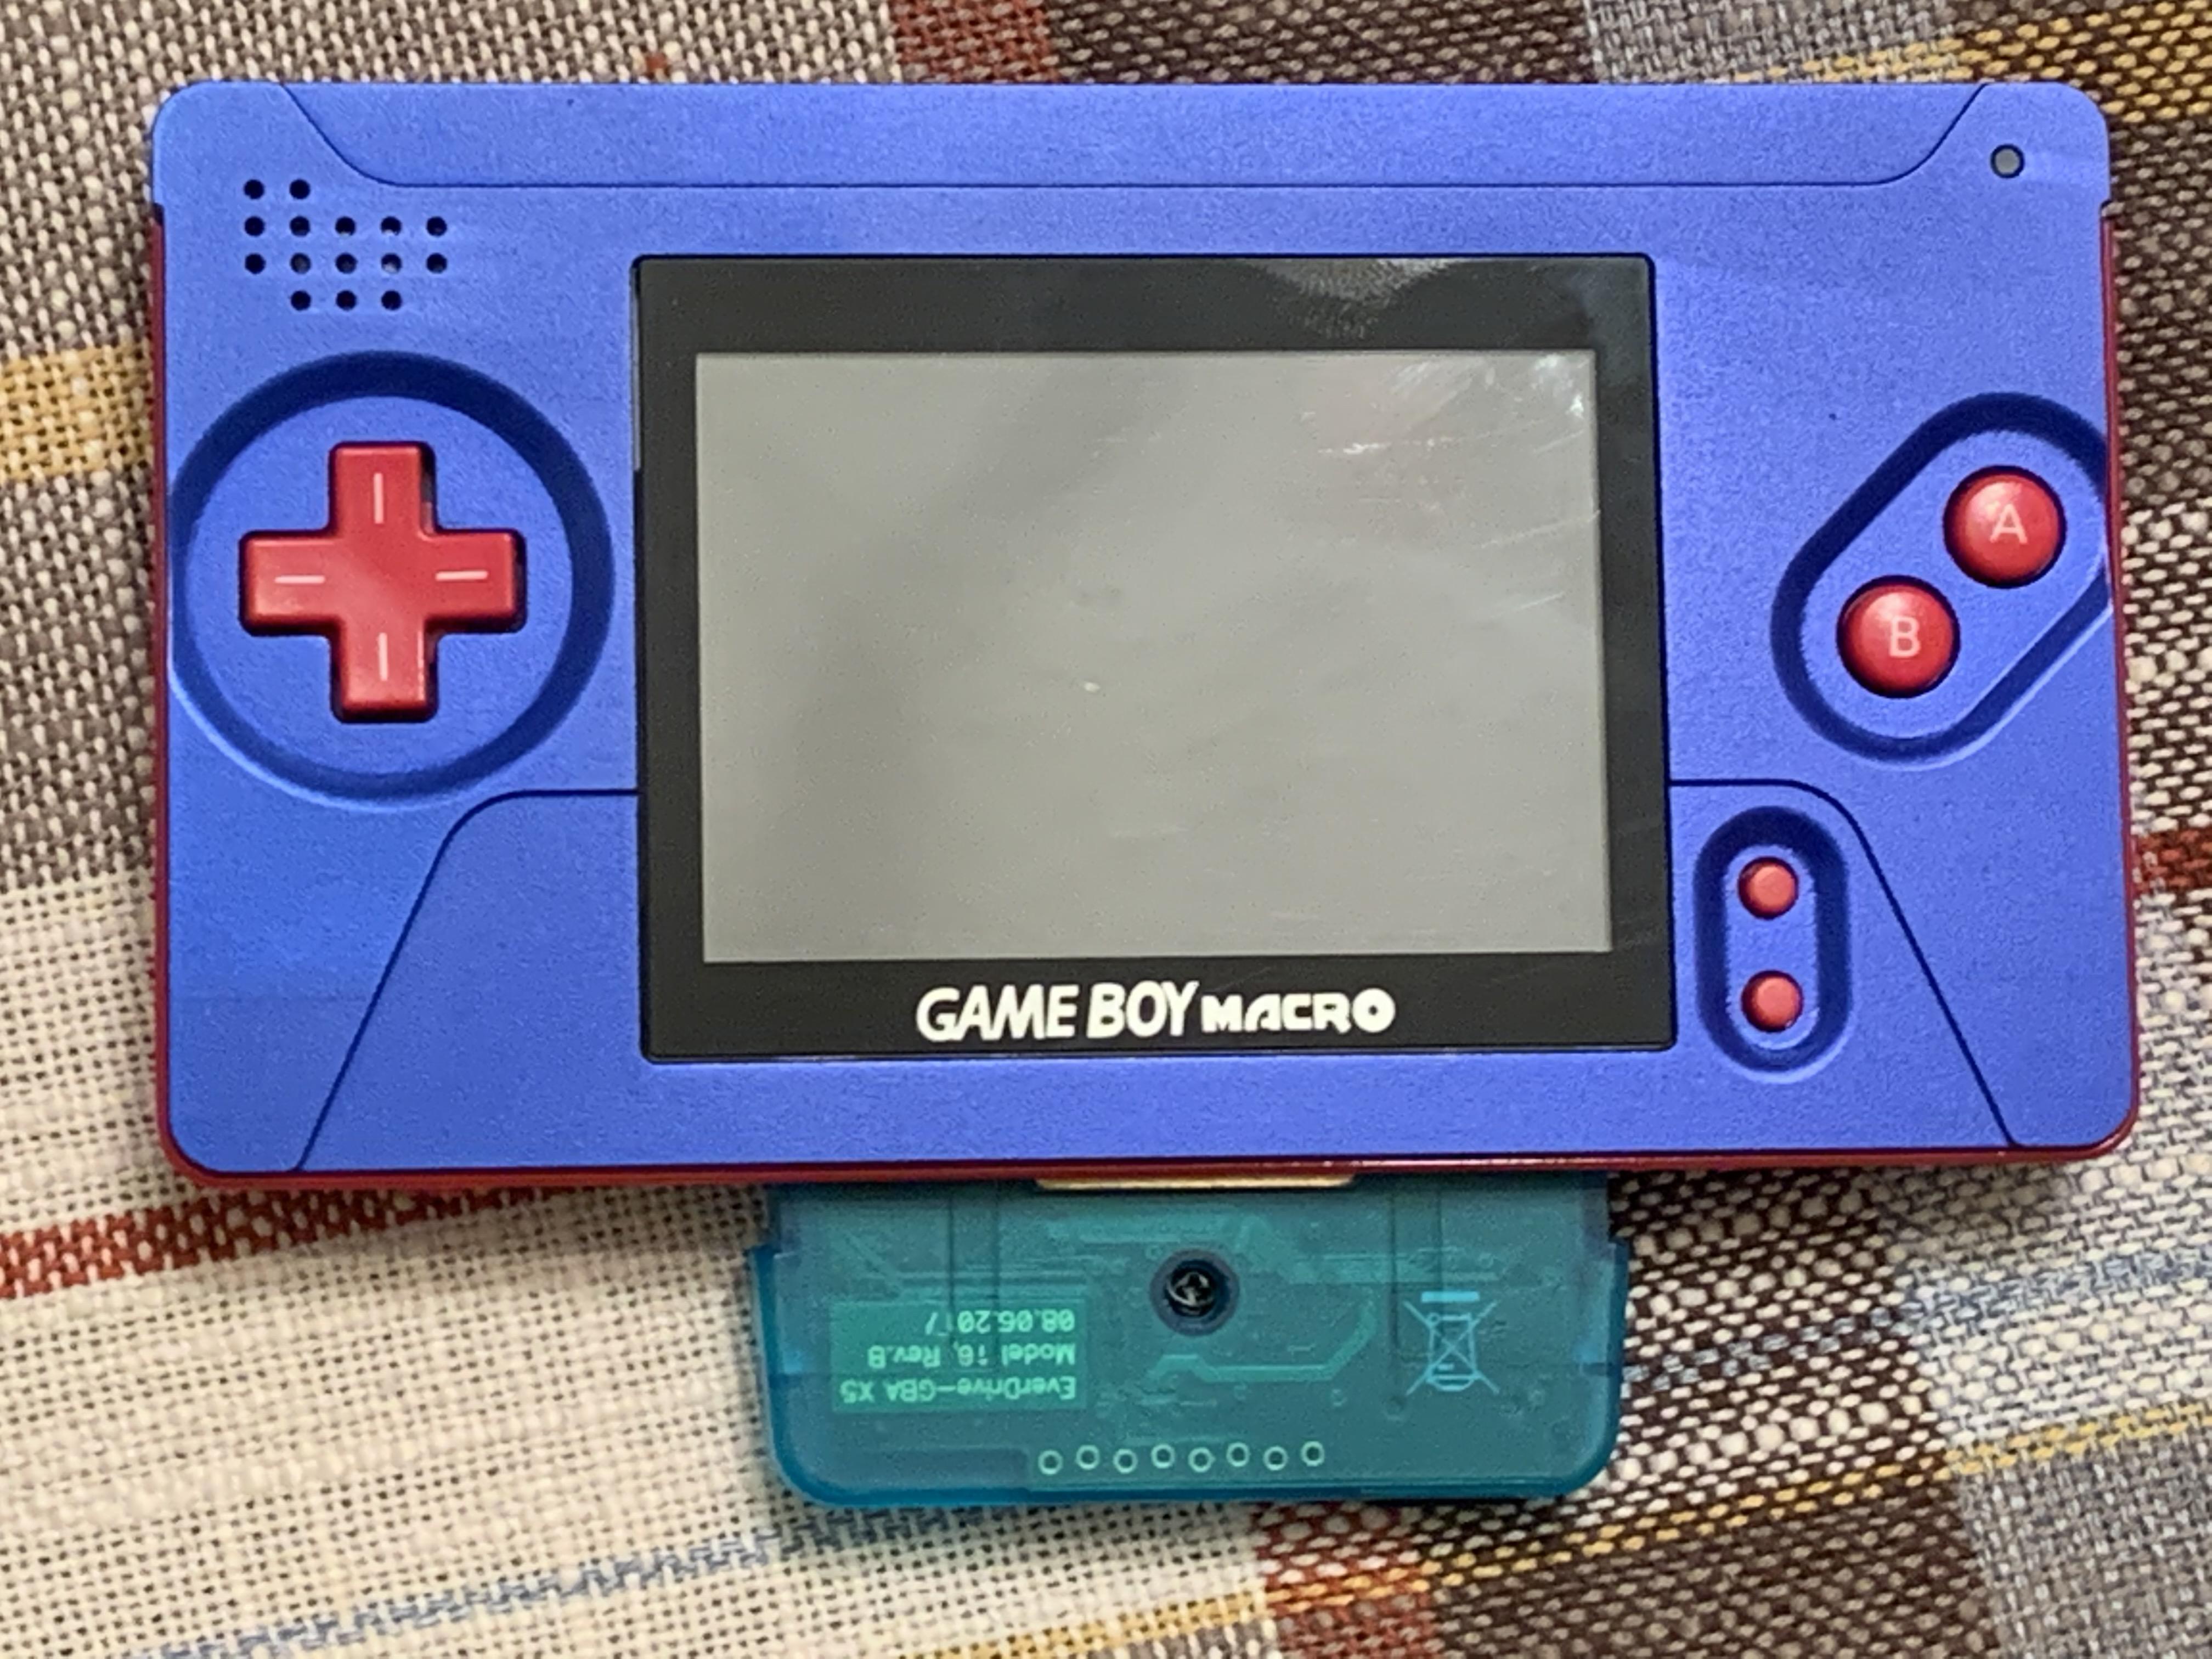
When Nintendo released the Game Boy Advance 32-bit handheld in 2001, the device instantly became a favorite among gamers. Mods have added new screens, buttons, batteries, and shells to the Game Boy Advance. Despite its flaws, the Game Boy Macro is possibly the best handheld Nintendo has ever made that is not made by the company. I’ve never had a simpler operation than snaving a DS Lite macro into a Game Boy macro. A mod like this will cost between $200 and $250 if you don’t have DS lite, components, or tools. If you eliminate all of the components, you can lower the budget to less than $100. There is still some cost, but worthwhile hardware mods are not cheap.
The speakers in the DS Lite are too large for the bottom half of the portable to fit in because they are located next to the top screen. A Nintendo Switch Speaker is also required if you intend to mute your Game Boy Macro. It may appear difficult, but soldering should be simple for beginners. The PCB will be disassembled and then reassembled, with the top screen connector removed, the resistor and speaker soldered together, and the speaker reinstalled. More specific visual steps can be found in Macho Nacho Productions’ excellent breakdown of the mod. The 3.5mm jack on the DS Lite works fine, but it must be upgraded to a larger speaker. Following step 5, the Boxy Pixel shell must be used to remove the digitizer so the system can be properly aligned.
After connecting the ribbon cable to the PCB, you can now hold the battery in place by your fingers. Before you begin working on the project, check to see if the power and sound sliders are correctly positioned. Even mediocre titles have seen their prices on eBay skyrocket, which is astounding. If you want to avoid paying a high price for GBA games, buy them from somewhere else or wait for the prices to drop. A local retro game store owner recently paid $200 for a complete-in-box copy of The Legend of Zelda: The Minish Cap. Nintendo has no plans to release the Game Boy Advance games for the Switch. It is possible to emulate games such as the EZ-Flash Omega or the EverDrive-Game Boy Advance X5. Despite this, piracy is prohibited and the price is prohibitively expensive. Nintendo has always pursued alateral thinking approach based on lagging technologies.
What Is Gba Macro?
There is no one answer to this question as it can mean different things to different people. Generally speaking, a macro is a set of instructions or a series of commands that are executed in order to automate a task or process. This can be something as simple as a series of keystrokes or mouse clicks that are carried out in order to complete a task, or it can be a more complex set of commands that are executed in order to automate a more complicated process.
Ds-lite To Macro Conversion
The front plate of the DS Lite Macro. The DS Lite Macro Front Plate is a CNC machined aluminum piece that allows you to transform the DS-lite into a single screen unit, also known as a macro. It is not necessary to modify the housings. The rear of the Nintendo switch must be made of plastic, and the speaker must be made of a similar material.
Gameboy Macro Xl
There is no such thing as a “gameboy macro xl.”
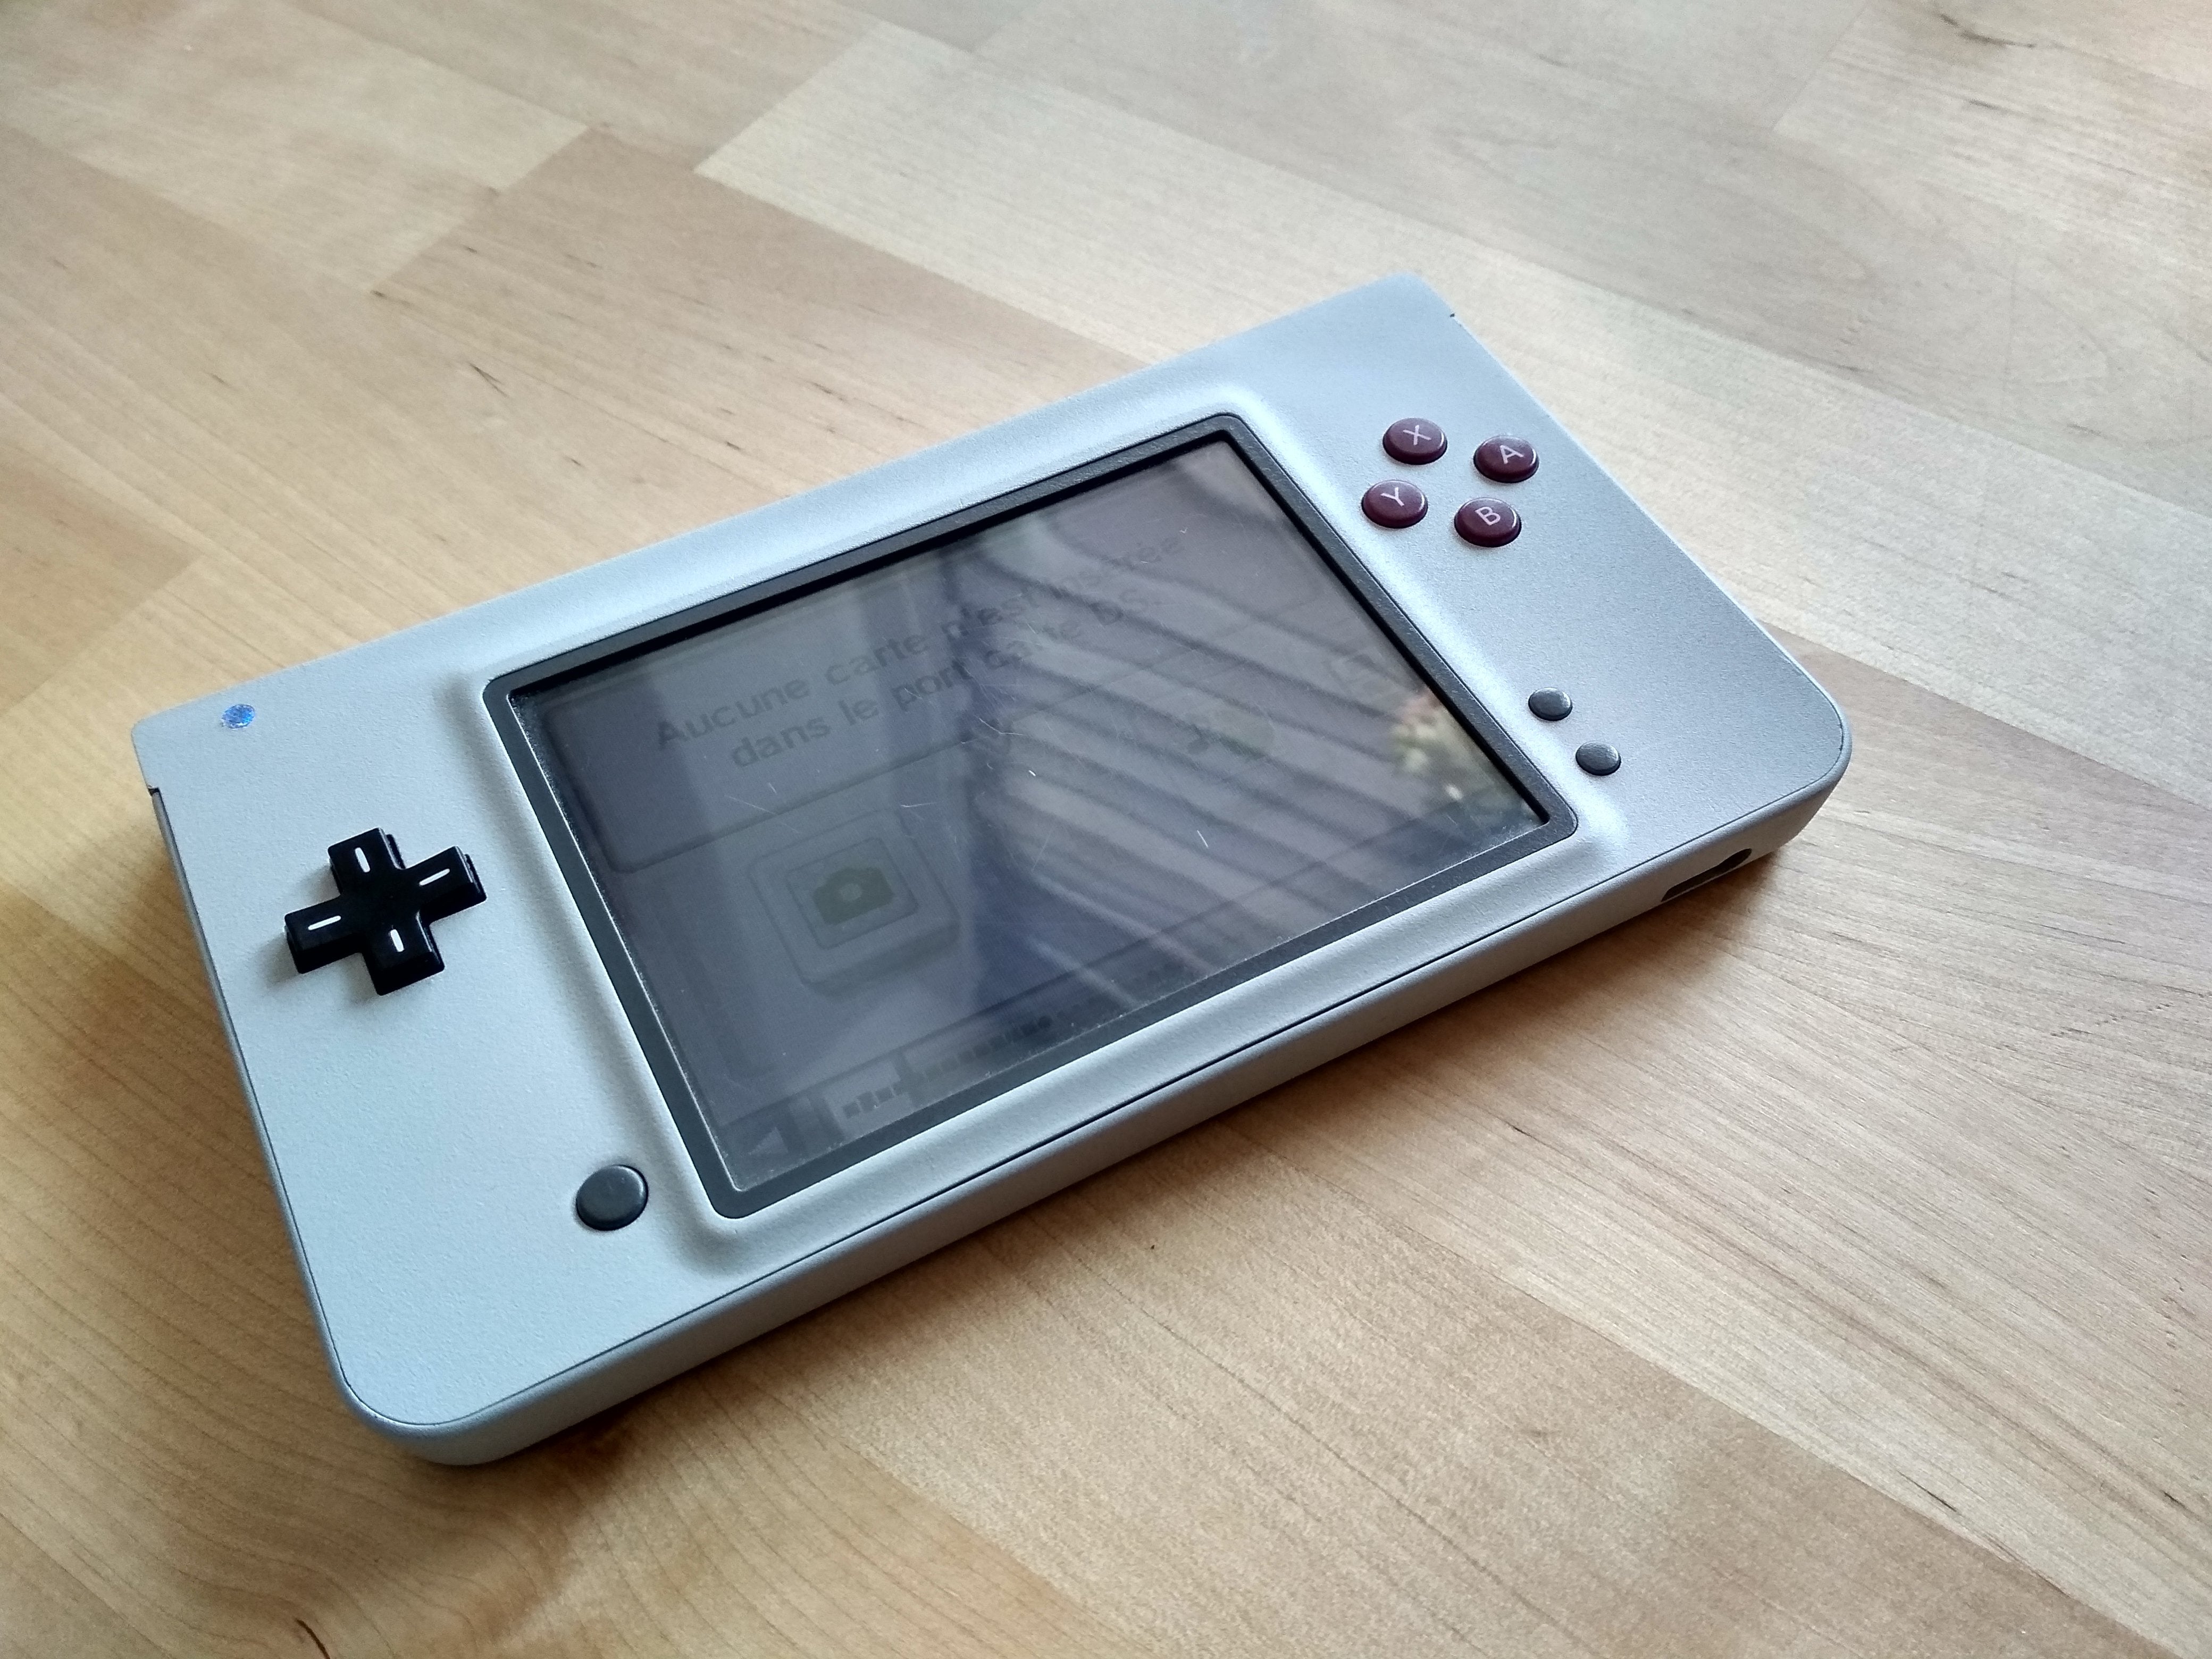
Rear Vue Mirror is a Nintendo DSi XL replacement for the Gameboy Macro XLi. My interest in Intro Modding began as a teenager. If you brick or injure yourself, I am not responsible for that. As a hobby, I thought it would be beneficial to assist anyone looking for information. It’s a good idea to play DS games that don’t require much bottom screen space. Some games, such as Pokemon Soul Silver, cannot be played well because you must constantly swap screens between screens. If you have a Gameboy Macro installed, you should be able to play DS games as well as GBA games.
If you do not have an SD card slot on the Nintendo DSi XL/LL, you must reinstall the Unlaunch app on your SD card. It’s a great time to clean the device and components, as well as replace the housing. It is relatively simple to modify a Nintendo DSi XL, but it is also fairly expensive and time-consuming. If you don’t know how to solder or work with small electronics, you should avoid doing this mod. My website is still running thanks to the links I have on Amazon, which earn me a small commission. Check that the wires carrying the speakers are the same color as the pictures. The soldering process involves both resistor and LED.
In addition, using a hot glue gun can be used to secure the speakers in place, which is most likely a lot easier. One of the appealing features of the DSi XL housing is that it has plenty of room to route wires. If everything is correctly assembled and properly positioned, you should be able to use your brand new Gameboy Macro XLi. You can now play all of your favorite console games on a portable gaming system capable of playing all of the classic consoles up to NDS standards. If you know how, you can do this project in a single day. The screen has a decent resolution, and the lighting is nice and even through. The speakers, in addition to sounding great in the back, are also extremely quiet and muffled. Most games have two separate screens that you must replace frequently when you play, so you must swap out screens frequently when you play.
Custom Gameboy
A custom gameboy is a handheld gaming device that has been customized to look and play however the user wants. They are usually made by taking an existing gameboy and making changes to it, such as adding new buttons, changing the color scheme, or adding new features. Custom gameboys can be as simple or as complex as the user wants, and are a great way to make a unique gaming device that is tailored to their specific needs and preferences.
Best Diy Game Boy Advance
The best DIY Game Boy Advance is one that you customize and build yourself. You can find kits online that will allow you to do this, and it can be a great way to get a unique handheld gaming device. You can add your own graphics and buttons, and make it exactly the way you want it. This can be a great project for anyone who loves gaming and is looking for a challenge.